
Railway guide · About 45 minutes · Free trial, then from $5 a month
Deploy an app to Railway with a custom domain
How we put a Dockerized Next.js app on Railway: the build, variables and health check, then a custom domain with both of the DNS records it needs.
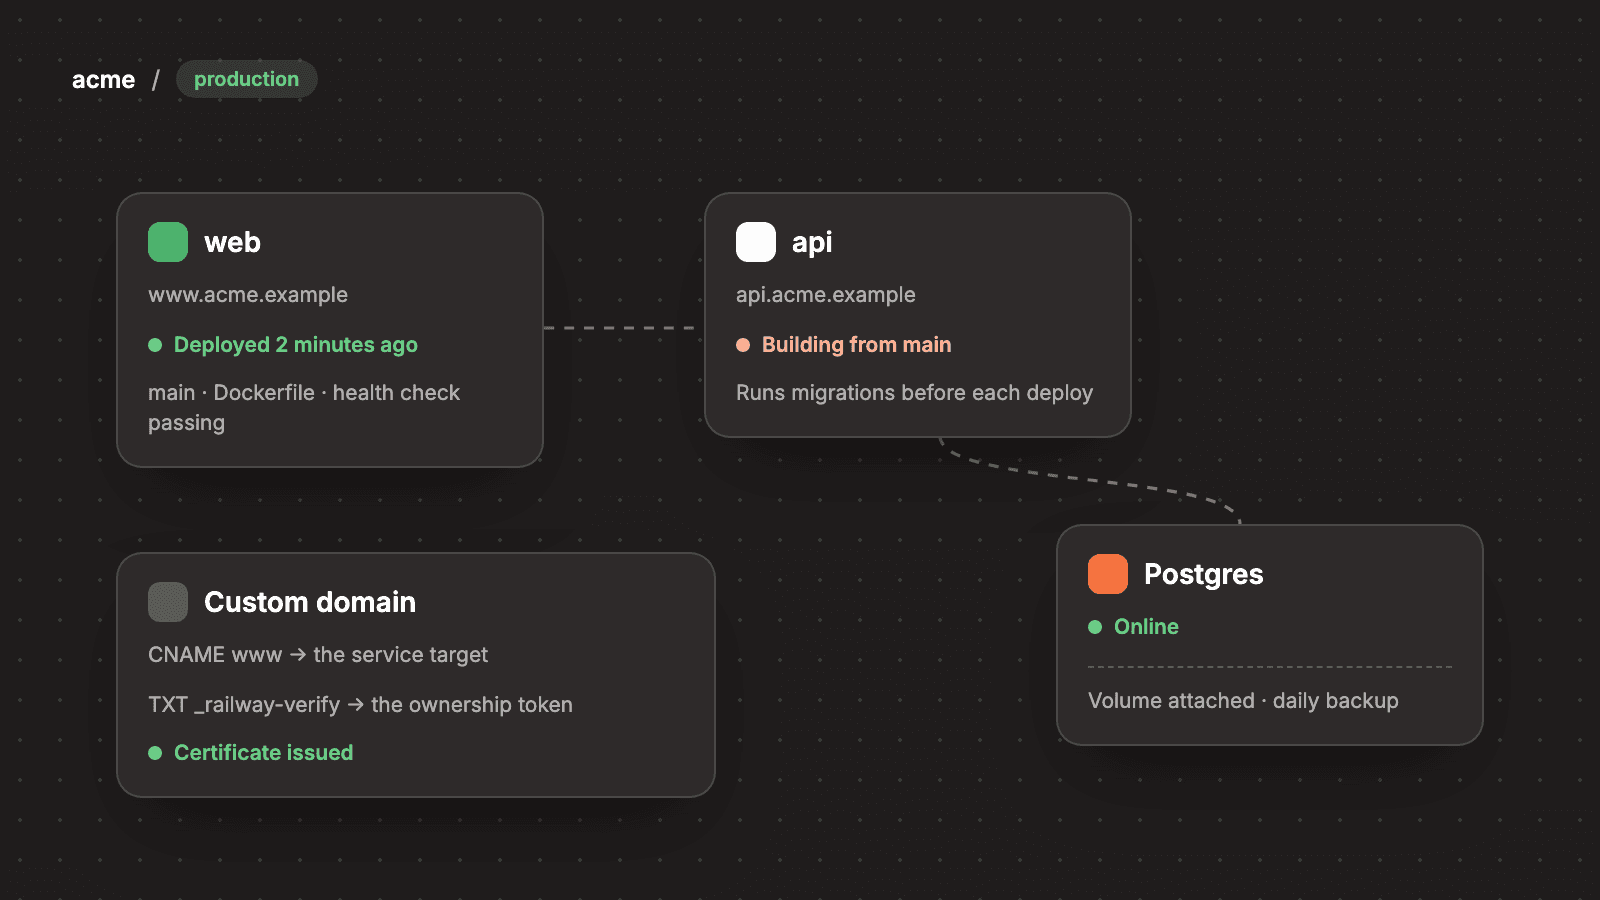
Last verified against the official Railway documentation on October 10, 2026. Prices and free tiers change, so open the linked pages before you rely on a number.
This site runs on Railway. It is a Next.js app in a pnpm monorepo, built from a Dockerfile at the repo root, and a push to our main branch deploys it. This guide is the path we follow for a new app, including the two places that have cost us time: the health check and the custom domain.
What it costs
At the time of writing, Railway's plans page lists a Free plan at $0 with $1 of usage credit a month, a Hobby plan at $5 a month that includes $5 of usage, and a Pro plan at $20 a month that includes $20 of usage. Usage is metered: the same page prices memory at $10 per GB per month, CPU at $20 per vCPU per month and outbound traffic at $0.05 per GB. Builds are free.
A new account starts on a trial with a one-time $5 credit that lasts up to 30 days, then reverts to the Free plan. The Free plan caps a service at 0.5 GB of memory and 1 vCPU, which is enough to work through this guide. An always-on service is billed for the memory it holds every minute, so check your usage after the first week before you decide which plan you need.
Before you start
- A GitHub repository with an app that builds and starts without manual steps.
- An app that listens on the port in the
PORTenvironment variable. Railway injects that variable and sends traffic and health checks to it. Our Dockerfile setsPORTitself, and we point the domain at the same port. - A route that answers with a 2xx status and depends on nothing that can be down. Ours is
/api/health. - For a custom domain, a domain whose DNS records you can edit.
Step 1: create the project and connect the repository
Create a project in the Railway dashboard and add a service from your GitHub repository. From then on Railway deploys when new commits are pushed to the connected branch. You choose that branch in the service settings. If the repository has a GitHub Actions workflow that runs on push, the same settings page offers Wait for CI, which holds a deployment until the workflow finishes and skips it if the workflow fails.
You can do the same from a terminal with the Railway CLI. Install it with npm i -g @railway/cli or brew install railway, then run railway login, railway init to create a project, and railway up to deploy the current directory. railway link attaches a directory to a project that already exists.
One monorepo note from our setup: we do not set a root directory on any service. Our Dockerfiles copy workspace packages and the root lockfile, so the build context has to be the repository root.
Step 2: tell Railway how to build
If a file named exactly Dockerfile sits at the root of the source directory, Railway uses it and the build log prints "Using detected Dockerfile!". For a Dockerfile somewhere else, set the service variable RAILWAY_DOCKERFILE_PATH to its path.
The same page explains the detail that catches Next.js apps: variables are not available inside a Docker build unless the Dockerfile declares each one with ARG. Any NEXT_PUBLIC_ value is inlined into the bundle at build time, so our app Dockerfiles declare those as build arguments. If a public key is missing in the browser but present on the server, look there first.
Do not start a new service on a railway.json or railway.toml file. We did, and Railway's config as code reference now marks those files as deprecated: existing ones are read until December 1, 2026, and new services cannot opt in. The replacement is Infrastructure as Code, a .railway/railway.ts file that you preview with railway config plan and apply with railway config apply. Railway does not read that file during a deploy. A push builds the code with whatever settings were last applied, so we run the plan on every pull request that touches the file.
Step 3: set variables
Open the service's Variables tab and add each value with New Variable, or paste a whole .env file into the RAW Editor. Changes are staged: nothing takes effect until you review and deploy them. From the CLI the form is railway variable set KEY=value.
Keep secret values on Railway and out of the repository. Our infrastructure file names every variable a service uses and holds none of the secret values.
Step 4: add a health check
Set a health check path on the service. During a deploy Railway polls that path until it gets a 2xx status, and only then makes the new deployment active. If the app never answers, the deploy fails and the previous version keeps serving. The default timeout is 300 seconds. We set ours to 30 so a broken build fails fast.
Two details from the same page are easy to miss. Railway calls the path only at the start of a deployment and does not monitor it afterwards, so it does not replace uptime monitoring. And the request arrives with the hostname healthcheck.railway.app, so an app that filters by host has to allow it.
Keep the health route out of your auth middleware. In our customer app the sign-in middleware throws on every request it handles when its secret key is missing, and that would fail a deploy for a reason that has nothing to do with whether the app is up. The middleware's matcher skips /api/health.
Step 5: add a database if you need one
Use the + New button on the project canvas, or run railway add --database postgres. The PostgreSQL service exposes a DATABASE_URL variable. Give it to your app with a reference variable: in the app's Variables tab, set DATABASE_URL to ${{Postgres.DATABASE_URL}}, where Postgres is the name of the database service.
Run migrations as a pre-deploy command, which executes after the build and before the new version starts. If it exits with an error, the deployment stops. We do not run migrations inside the Docker build, because a build should never change a schema.
Step 6: get a public URL
In the service's Settings, find Networking, then Public Networking, and click Generate Domain. Open the address and confirm the app answers before you touch DNS. It is much easier to debug a domain when you know the app behind it works.
Step 7: connect your custom domain
- In the same Public Networking section, click + Custom Domain and type the hostname, for example
www.example.com. The CLI equivalent israilway domain www.example.com. - Railway shows two DNS records: a CNAME, and a TXT record that proves you own the domain. Create both at your DNS provider exactly as shown.
- Choose the target port your app listens on.
- Wait for the green check mark next to the domain. Railway then issues a Let's Encrypt certificate on its own, usually within an hour of the DNS change.
Add both records. This is the step we have gotten wrong. Railway's documentation says the domain will not verify with only the CNAME in place, and that requests return a 404 even after the CNAME resolves. In our projects the TXT record is named _railway-verify under the subdomain. With the CNAME alone the site looks half-working: DNS resolves, and the certificate never arrives.
If your DNS is on Cloudflare, we keep both records set to DNS only (the grey cloud) so Cloudflare's proxy does not sit between Railway and its certificate. If you do proxy, Railway's page says the Cloudflare SSL/TLS mode has to be Full, and that Full (Strict) will not work as intended.
A root domain such as example.com cannot hold an ordinary CNAME, so it needs a provider that supports CNAME flattening or ALIAS records. Railway lists Cloudflare, DNSimple and Namecheap among those that do, and AWS Route 53 and GoDaddy among those that do not, with moving your nameservers to Cloudflare as the workaround. We serve this site on www and redirect the root to it with a Cloudflare redirect rule.
The same page gives the limits: one custom domain on a trial, two per service on Hobby and 20 per service on Pro.
When the domain answers, update any variable that holds the site's public URL and redeploy. Ours feeds the sitemap, canonical tags and social images, and they keep pointing at the Railway address until we change it.
When a deploy goes wrong
railway logs streams the running deployment and railway logs --build shows the build. To go back, open the service's deployments, click the three dots at the end of an earlier one and choose Rollback. Railway restores both the image and the variables that deployment had. It does not undo a database migration, so treat schema changes as a separate decision.
Hand this to your agent
Paste this into your coding agent with the repository open. Install the Railway CLI and run railway login yourself first, since the agent should not handle your account sign-in.
- Read the repository and confirm the app listens on the
PORTenvironment variable and has a route that returns 200 with no dependencies. Add/api/healthif it is missing, and exclude it from any auth middleware. - If there is no Dockerfile at the repository root, propose one and stop for my approval before writing it. Declare every build-time variable with
ARG. - Run
railway linkif a project exists, otherwiserailway init. Do not create arailway.jsonorrailway.toml. - List the environment variables the app reads. Set the non-secret ones with
railway variable set KEY=value. Give me the names of the secret ones and wait while I set them myself. Never print or commit a secret value. - Deploy with
railway up, then readrailway logsand fix errors until the health check passes. - Generate a Railway domain and confirm the app answers on it.
- Run
railway domainwith my hostname, thenrailway domain statuswith the same hostname. Show me every DNS record Railway asks for, the CNAME and the TXT, and wait while I create them. Do not edit my DNS. - Check the domain status until it verifies, then update the site URL variable, redeploy and confirm the site loads over HTTPS on my hostname.
- Finish with a list of everything you created on Railway and every variable name you set.
Next
With the app live, the usual next two jobs are adding sign-in with Clerk and taking payments with Stripe.
Sources
- Pricing plans, Railway Docs
- Free trial, Railway Docs
- CLI, Railway Docs
- GitHub autodeploys, Railway Docs
- Dockerfiles, Railway Docs
- Config as code reference, Railway Docs
- Infrastructure as Code, Railway Docs
- Variables, Railway Docs
- Healthchecks, Railway Docs
- PostgreSQL, Railway Docs
- Pre-deploy command, Railway Docs
- Public networking, Railway Docs
- Working with domains, Railway Docs
- Deployment actions, Railway Docs
Want this already wired together?
We are packaging this stack into production kits. They are not available yet. If you would rather have us build it with you now, book a call.