
Google Workspace guide · About an hour of work, spread over a few days of DNS waiting · From $7 a user a month
Set up business email on Google Workspace
A mailbox on your own domain, the MX, SPF, DKIM and DMARC records that get its mail delivered, and addresses like hello@ and billing@ without paying for more users.
Last verified against the official Google Workspace documentation on October 11, 2026. Prices and free tiers change, so open the linked pages before you rely on a number.
Working with a coding agent? Get the agent file for this guide. It covers the same setup as exact steps an agent can follow.
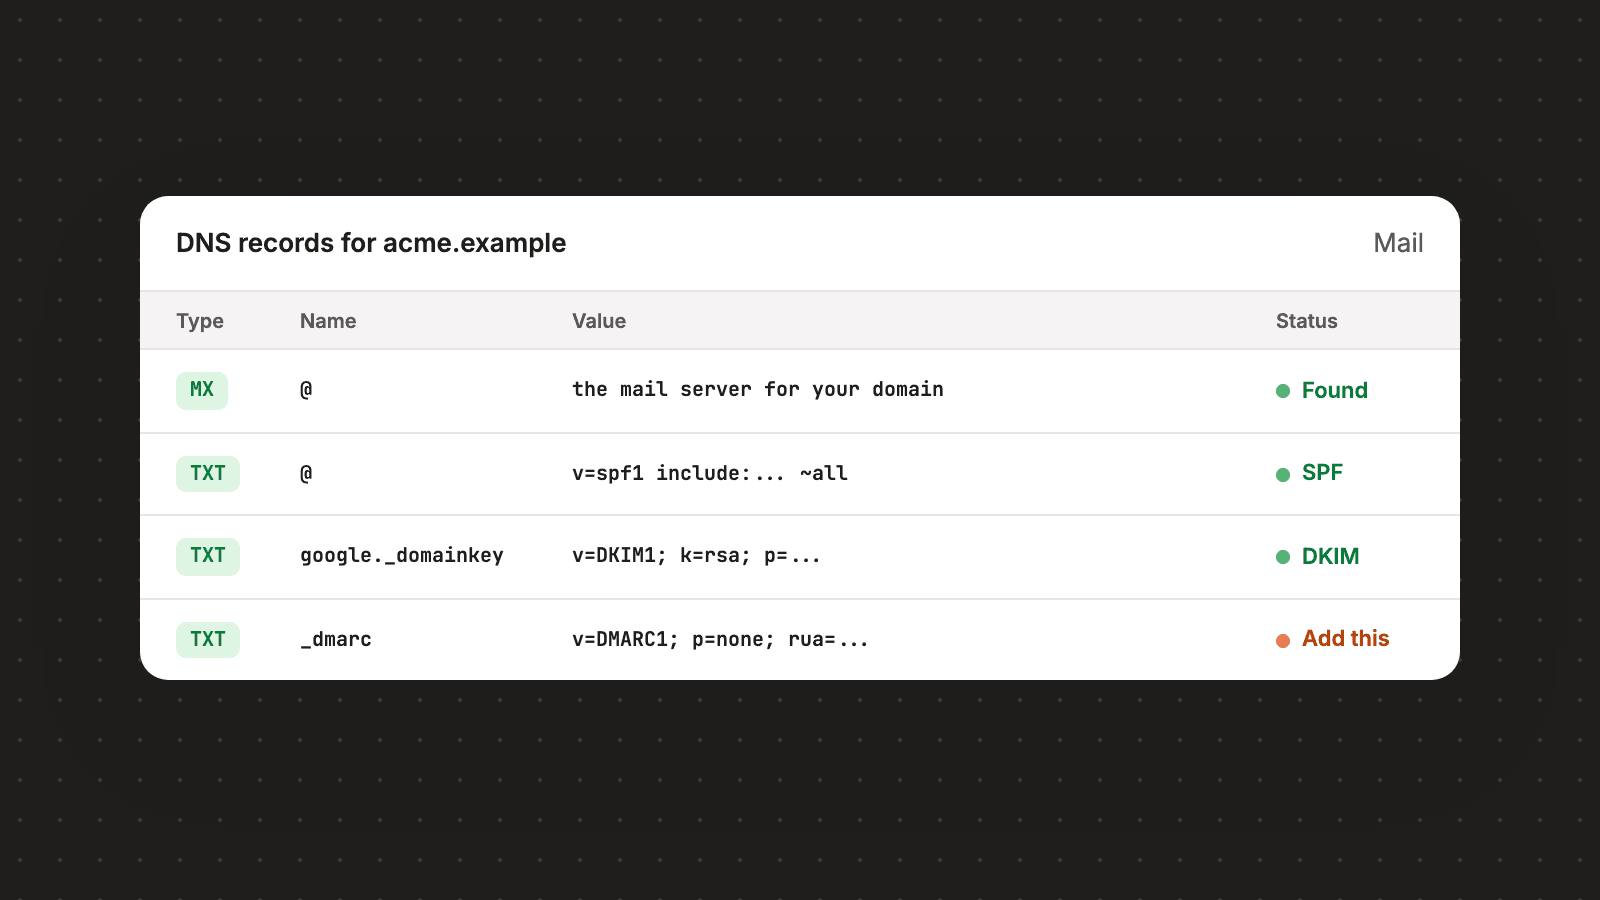
Mail for this site's domain runs on Google Workspace, and the domain's DNS is hosted on Cloudflare. This guide is the setup for a new company: a mailbox on your own domain, the DNS records that get your mail delivered and trusted, and a few extra addresses that cost nothing. We checked our own records while writing it and found one missing. Our domain published MX, SPF and DKIM records and had no DMARC record. We added it the same day, with the record in step 6, which is why that step is here and why you should check yours instead of assuming.
Why a mailbox on your own domain
A free Gmail address works until the company is more than you. The address belongs to a person, so there is no admin who can reset it, hand it to someone else or close it when a contractor leaves. You also cannot publish mail authentication for gmail.com. Gmail's email sender guidelines tell every sender to set up SPF or DKIM for their sending domain, and those are DNS records, so they only exist for a domain you control. Later guides in this series send mail from your app on the same domain, and they build on the records you add here.
Why Google Workspace
We use it, so every step below is one we can check against our own domain. For a first-time founder the practical case is short: the mailbox is Gmail, which most people already know how to use, the admin console covers users, aliases and security in one place, and Google documents each DNS record on a page you can read in five minutes. Microsoft 365 and Zoho Mail are the two alternatives most founders weigh. We have not run either for this company, so we do not review them here. The DNS ideas in this guide (MX, SPF, DKIM, DMARC) are the same on all three, with different record values.
What it costs
At the time of writing, Google's pricing page lists Starter at $7 per user per month, Standard at $14 and Plus at $22, in US dollars, before tax. Starter comes with custom business email and 30 GB of pooled storage per user, which is enough for a new company. The page offers a 14-day trial, shows a toggle labeled Annual that saves 16% with a one-year commitment, and runs introductory discounts for new customers that change often. The final price is shown before you finish signing up, so read it there.
You pay per user, and a user is a person with a sign-in. Addresses like hello@ and billing@ do not need their own users. Step 7 sets them up as aliases, which Google includes at no extra cost.
Before you start
- A domain you own, and a sign-in to wherever its DNS records are edited. That is the registrar unless you moved the nameservers. Ours are on Cloudflare.
- A terminal with
dig. It ships with macOS and most Linux systems. If you do not have one, Google's Admin Toolbox Dig runs the same lookups in a browser. - A card for billing, and a phone or security key for 2-step verification.
- Patience for DNS. Google says each kind of record can take up to 48 or 72 hours to be recognized. In practice you can do the hands-on work in an hour, spread over a few days.
Start by reading what the domain publishes now. Replace example.com with your domain:
dig +short NS example.com                      # who hosts the DNS
dig +short MX example.com                      # where mail is delivered today
dig +short TXT example.com                     # SPF and verification records
dig +short TXT google._domainkey.example.com   # DKIM at Google's default selector
dig +short TXT _dmarc.example.com              # DMARC; no output means no record
If the MX line already shows a mail provider, people are receiving mail there. Changing MX records moves all incoming mail, so plan the switch before step 3.
Step 1: sign up and create the admin account
Start the trial from the pricing page and enter the domain you already own. Google's sign-up page says you can use a domain you own or buy one during sign-up. Use the one you own, so the DNS stays where you already manage it.
You come out of sign-up with an administrator account, the one every Admin console step below is done from. Treat its password like the keys to the company, because that account can reset every other mailbox. Step 8 locks it down.
Step 2: verify the domain
Google will not turn on mail until you prove the domain is yours. Its verification page gives the deadline: verify within the first 9 days of the trial, and an unverified account is deleted within 21 days of sign-up unless billing is set up.
The proof is one TXT record. Following Google's TXT verification steps:
- In the setup tool, click Get started and choose your registrar, or My domain uses a different host.
- Copy the Value. It starts with
google-site-verification=. - Add a TXT record at your DNS host with the name left blank or set to
@, and that value. - Back in the setup tool, select Come back here and confirm, then click Confirm.
# Type  Name  Value (copy yours from the setup tool)
TXT     @     google-site-verification=YOUR_UNIQUE_VALUE
On Cloudflare, records are added on the DNS Records page with Add record, then Save. The proxy setting on that form applies to A, AAAA and CNAME records only, so there is nothing to switch for the TXT and MX records in this guide.
Google says the record can take up to 72 hours to be recognized, and that it usually confirms within an hour once the record is live. After verification the same page says the TXT record can be safely removed. Our domain still publishes a google-site-verification record.
Step 3: point incoming mail at Google with an MX record
The MX record tells other mail servers where to deliver mail for your domain. Create a user for each person first. Google's Gmail activation checklist puts user accounts before the MX change, because mail for an address with no account has nowhere to go.
For a new setup, Google's MX page now documents a single record: type MX, name blank or @, priority 1, value smtp.google.com. Some DNS hosts want a trailing period on the value.
# Type  Name  Priority  Value
MX      @     1         smtp.google.com
The same page says to remove any other MX records, since old ones can break delivery. Then, in the Admin console under Account, Domains, Manage domains, click Activate Gmail for the domain. Allow up to 72 hours for the change to be recognized.
You will see a different, five-record set in older tutorials and on older domains, ours included. This is what our domain publishes today:
# Type  Name  Priority  Value
MX      @     1         aspmx.l.google.com
MX      @     5         alt1.aspmx.l.google.com
MX      @     5         alt2.aspmx.l.google.com
MX      @     10        alt3.aspmx.l.google.com
MX      @     10        alt4.aspmx.l.google.com
Google's page covers this case in one note: domains that started before 2023 might have MX values that begin with aspmx, those legacy values are still supported, and if mail is working no change is required. So do not copy the five-record set into a new domain, and do not rush to replace it on an old one.
Step 4: add SPF
SPF is a TXT record that lists the servers allowed to send mail for your domain. Receiving servers check it to decide whether a message that claims to be from you really is. Google's SPF page gives the exact record for a domain that sends only through Google Workspace:
# Type  Name  Value
TXT     @     v=spf1 include:_spf.google.com ~all
That is the record our domain publishes. Three details from the same page:
- The name is
@for the domain itself. A subdomain that sends mail needs its own SPF record. - Google recommends ending the record with
~all, which tells receiving servers to treat mail from unlisted servers as spam. - It can take up to 48 hours for SPF to start working.
If another service sends mail as your domain, such as a newsletter tool, it has to be added to this one record. The SPF page has a table of combined records for common senders. Add the new sender to the existing line. Google's SPF troubleshooting page says a domain can have only one SPF record, and that mail from a domain with several might end up in spam.
Step 5: turn on DKIM
DKIM adds a signature to each outgoing message, made with a private key on the sending server. You publish the matching public key in DNS, and receiving servers use it to confirm that the message came from your domain and was not changed on the way. Unlike SPF, the record is different for every domain, so you generate it. Google's DKIM page has the steps:
- Wait. After Gmail is turned on, Google says you must wait 24 to 72 hours before you can get the DKIM key, and trying earlier can produce an error.
- In the Admin console go to Apps, Google Workspace, Gmail, and click Authenticate email.
- Select the domain and click Generate New Record. Choose a 2048-bit key if your DNS host supports it, and keep the default prefix selector,
google. - Copy the DNS host name and the TXT record value into a new TXT record at your DNS host.
- Return to the same page and click Start authentication. This is the step people forget. Publishing the record alone does not start signing.
# Type  Name               Value (copy both fields from the Admin console)
TXT     google._domainkey  v=DKIM1; k=rsa; p=YOUR_PUBLIC_KEY
Ours is published at google._domainkey, the default selector. When signing is working, the status at the top of the Authenticate email page reads Authenticating email with DKIM. Google allows up to 48 hours for that, and notes the page may keep asking you to update DNS during that time even when the record is correct.
Step 6: add DMARC, starting at none
DMARC is a third TXT record. It tells receiving servers what to do with mail that fails SPF and DKIM, and where to send reports about it. Without it, each receiver decides for itself and you never hear about the failures. This is the record our own domain was missing.
Google's DMARC page sets two conditions first: SPF or DKIM must already be on, and you should allow 48 hours after setting them up before adding DMARC. Then publish a record at _dmarc with the policy set to none, which Google recommends as the starting point:
# Type  Name    Value
# Some DNS hosts want the full name, _dmarc.example.com
TXT     _dmarc  v=DMARC1; p=none; rua=mailto:dmarc@example.com
What the tags mean, from the same page:
v=DMARC1is required and comes first, followed byp.p=nonetakes no action on failing mail. It is delivered as before and logged in a daily report.ruais where the reports go. Google recommends a group or a dedicated mailbox, because a personal inbox fills with reports. Step 7 shows how to makedmarc@without paying for a user.
Leave it at none while you read the reports and confirm that everything sending as your domain passes. Then tighten the policy in two moves, as Google describes: quarantine sends failing mail to the recipient's spam folder, and reject refuses it.
# Next: failing mail goes to the recipient's spam folder
TXT     _dmarc  v=DMARC1; p=quarantine; rua=mailto:dmarc@example.com
# Last: failing mail is rejected
TXT     _dmarc  v=DMARC1; p=reject; rua=mailto:dmarc@example.com
The optional pct tag applies the policy to a percentage of failing mail, which lets you move in smaller steps. There is no deadline for a small sender. Gmail's sender guidelines require DMARC only from senders of more than 5,000 messages a day to Gmail accounts, and accept a policy of none even then. Add the record anyway. It costs nothing, and it is the only one of the three that reports back to you.
Step 7: add hello@, billing@ and support@ without paying for more users
An alias is a second address on an existing mailbox. Google's alias page says an admin can add up to 30 for each user at no extra cost, and that mail sent to an alias arrives in that user's inbox.
- In the Admin console go to Directory, Users, and open the user.
- Under the user's name, click Add Alternate Emails.
- Enter the part before the @ sign, for example
hello, and save. Google says changes can take up to 24 hours and are usually faster.
Receiving works at once. Replying from the alias takes one more step that the user does in Gmail, described on Gmail's send from a different address page: open Settings, See all settings, the Accounts tab, and under Send mail as click Add another email address. After that, the From line in a new message offers the alias.
Use a group when an address should reach more than one person, such as support@ once there are two of you. In the Admin console go to Directory, Groups, and click Create group. A group gives its members one shared address. The access settings table on that screen has a Who can post setting and an External category, which Google defines as anyone outside your organization. Customers are external, so a group that should receive their mail has to allow external posts. Send a message to the group from a personal account to confirm it before you print the address anywhere.
Our rule of thumb: one person, use an alias. Several people, use a group. A real second user only when someone needs their own sign-in.
Step 8: protect the admin account with 2-step verification
Whoever controls the admin account controls every mailbox, and through password resets, most of the other accounts the company owns. Google's 2-Step Verification page states that Google is enforcing it for administrator accounts, so set it up on your terms before you are prompted.
- Signed in as the admin, open your Google Account, go to Security and sign-in, and select Turn on 2-Step Verification.
- For other users, in the Admin console go to Security, Authentication, 2-step verification, and check Allow users to turn on 2-Step Verification. The Enforcement setting on the same page makes it mandatory, immediately or from a date you choose.
Google's best practices for administrator accounts add four things worth doing on day one: use a security key, which it calls the most secure form of 2-step verification, save backup codes somewhere safe before you need them, add a recovery phone number and email address to the admin account, and do not use a super admin account for daily work. For a company of one, that last point means the admin sign-in and your everyday mailbox are two different users. Whether that is worth a second seat is your call. The first three are free.
Step 9: check everything
Run the lookups again. Each line below the command is the answer to expect on a new setup:
dig +short MX example.com
# 1 smtp.google.com.

dig +short TXT example.com
# "v=spf1 include:_spf.google.com ~all"

dig +short TXT google._domainkey.example.com
# "v=DKIM1; k=rsa; p=..."

dig +short TXT _dmarc.example.com
# "v=DMARC1; p=none; rua=mailto:dmarc@example.com"
Then test with real mail, in both directions:
- From a personal account, send a message to your new address and to each alias and group. Each one should arrive.
- From the new mailbox, send a message to a Gmail address that is not your own. Google's DKIM page notes that you cannot verify DKIM by sending yourself a message.
- Open that message in Gmail, click More next to Reply, then Show original. Look for the Authentication-Results header. Google says the DKIM result should read something like pass or OK.
If a lookup returns nothing right after you added the record, wait and run it again before changing anything. A record that is still spreading looks exactly like a record that is missing.
Mistakes to avoid
- Copying the five
aspmxrecords from an old tutorial into a new domain. Google documents one record,smtp.google.com, for new setups. - Leaving the previous provider's MX records in place next to Google's. Some mail will keep going to the old mailbox.
- Creating a second SPF record for a new sending service. Combine the senders in one record.
- Publishing the DKIM record and never clicking Start authentication.
- Starting DMARC at
reject. If a tool you forgot about sends as your domain, its mail is refused and nobody tells you. - Assuming DMARC is there because SPF and DKIM are. Run the
digline for_dmarc. We did, on our own domain, and it came back empty until we added the record. - Buying a user for every address. Aliases and groups cover role addresses.
Hand this to your agent
This guide is also written out for a coding agent, as one Markdown file. It has the checks to run in your repository first, each step with its commands and code, the environment variables by name, a check after every step, and the points where the agent has to stop and ask you. Get the agent file and give your agent the file or its address.
An agent can do the reading and checking in this guide: look up the current records, write out the exact records to add, and verify each one after you publish it. Sign-up, billing, the Admin console and the DNS changes themselves stay with you, and the file tells the agent to stop at each one.
Next
The same DNS zone holds the records for your website. When you put an app on a custom domain, the records are added the same way: see deploying to Railway with a custom domain.
Sources
- Compare pricing plans, Google Workspace
- Sign up for a free Google Workspace trial, Google Workspace Help
- Verify your domain for Google Workspace, Google Workspace Help
- Verify your domain with a TXT record, Google Workspace Help
- Activate Gmail with Google Workspace, Google Workspace Help
- Set up MX records for Google Workspace, Google Workspace Help
- Set up SPF, Google Workspace Help
- Troubleshoot SPF issues, Google Workspace Help
- Set up DKIM, Google Workspace Help
- Set up DMARC, Google Workspace Help
- Email sender guidelines, Gmail Help
- Add or delete an alternate email address (email alias), Google Workspace Help
- Send emails from a different address or alias, Gmail Help
- Create a group in your organization, Google Workspace Help
- Deploy 2-Step Verification, Google Workspace Help
- Turn on 2-Step Verification, Google Account Help
- Security best practices for administrator accounts, Google Workspace Help
- Admin Toolbox Dig, Google
- Manage DNS records, Cloudflare Docs
Want this already wired together?
We are packaging this stack into production kits. They are not available yet. If you would rather have us build it with you now, book a call.